Make your Bond Blocks magnetic. Use for ‘We Do’ instruction on a whiteboard with the activity board printed on paper.
Purchase J.Burrows Self-Adhesive Magnetic Strips (40 x 15mm – 50 pack) from Office Works. You only need one packet. Just peel and stick. I’ve tried several types and found these best.
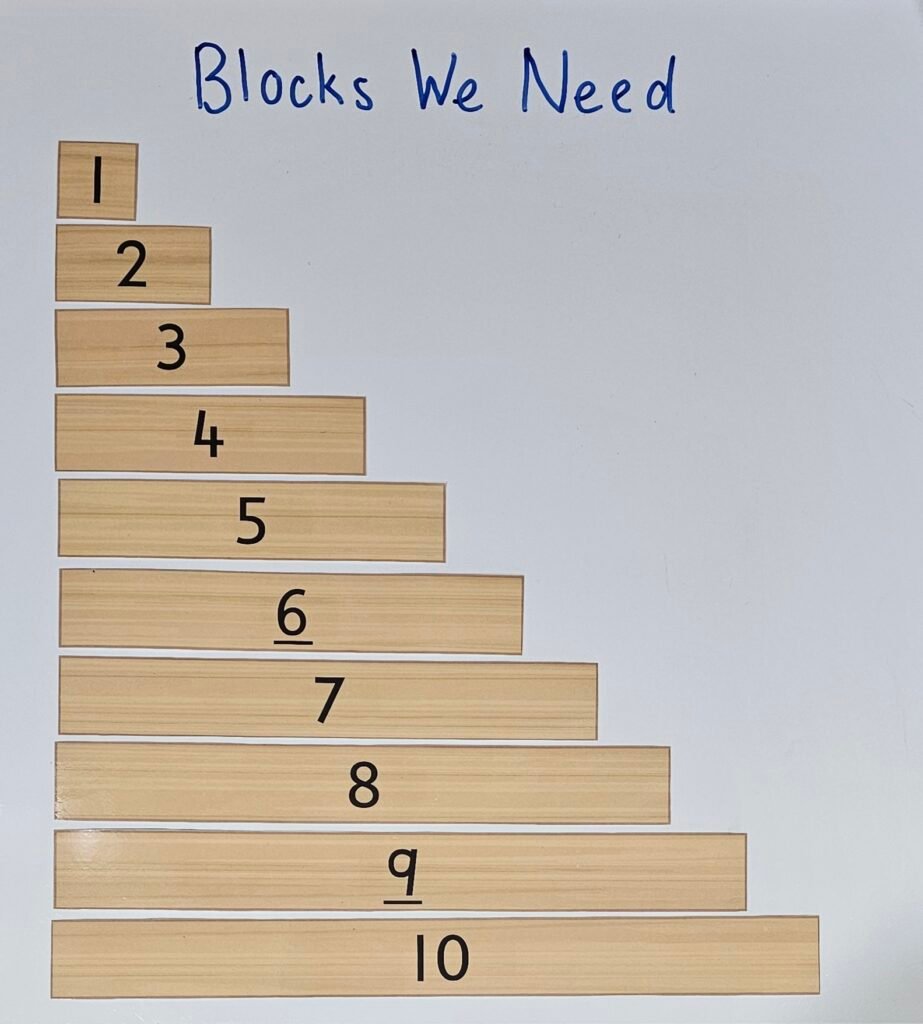
Enlarged Paper Bond Blocks
Click the image to download. Colour print, laminate and stick them to the whiteboard with magnetic tape. Stick the Bond Blocks needed for the session on the whiteboard. This visual help students to:
Take out the correct blocks when setting up the activity. This reduces the number of times students ask, “What blocks do I need?”
Check the orientation of their blocks.
Introductory Play
Use the A4 card Exploratory Play 1 ‘Introductory Play’ to teach students how to:
Open a set of Bond Blocks with the sticker up.
Use Bond Blocks appropriately.
Stop and look when they hear the cue. That means not touching blocks.
Pack away a set of Bond Blocks, checking there are no blocks missing.
Close a case of Bond Blocks, clicking shut both clips before picking up the case by the handle.
Store the Bond Blocks case when finished.
Implementation: General Tips video
Tier Two and Three Intervention Implementation video